How To Use Installed Fonts On Iphone
Have you ever noticed that "missing font" warning when you opened a document or spreadsheet on your iOS device that was created on a Mac or Windows machine? In this article, I will show you how to fix that problem and how to install fonts on iPhone or iPad using a free app called iFont.
Download iFont
- iFont in the App Store (download)
Why install fonts on iOS?
I create most content, such as spreadsheets or presentations on my iMac or MacBook, so font selection on iOS almost never was an issue.My iOS devices are usually limited to the consumption of content, and on the iPad, I ran into the occasional and very annoying "missing fonts" warning. Nevertheless, I have to admit that until recently, I haven't given installing fonts on the iPhone or iPad much thought. In fact, I didn't even think that was possible. As a result, I learned to live with the warning I got every time I opened my travel pack list.
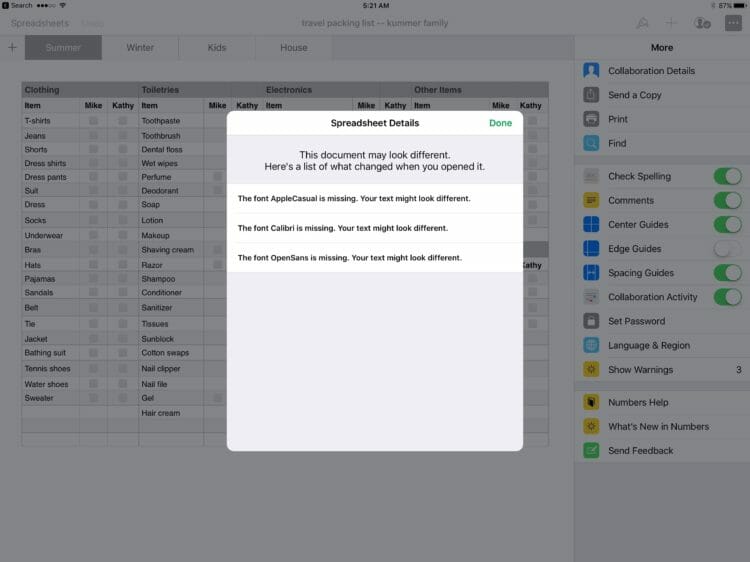
Microsoft PowerPoint doesn't complain about missing fonts, it just picks an alternative font, which often leads to text and layout looking different compared to when viewed on macOS or Windows.
Configuration profiles
I knew about the so-called configuration profiles, but just recently learned that you could also use them to install additional fonts.
A configuration profile is an XML file that allows you to distribute configuration information. If you need to configure a large number of devices or to provide lots of custom email settings, network settings, or certificates to a large number of devices, configuration profiles are an easy way to do it.
Configuration profiles are typically used by administrators in schools or at work to mass-configure iOS devices, but most iOS users probably don't know much about them. I was first confronted with such profiles when I signed up for Apple's Public Beta Program. As part of enrolling in the program on iOS, you have to install a configuration profile inSettings –> General –> Profiles. Some VPN apps also use that mechanism to store network configuration settings.
How to install fonts on iPhone or iPad
Installing fonts on iOS is relatively easy once you have downloaded the iFont app from the App Store. The first step is to transfer the fonts you would like to install on your iPhone or iPad. If you use Dropbox or iCloud Drive, just copy the fonts into a directory inside either cloud storage provider. Alternatively, you can send yourself the fonts via email.
Install fonts from Dropbox
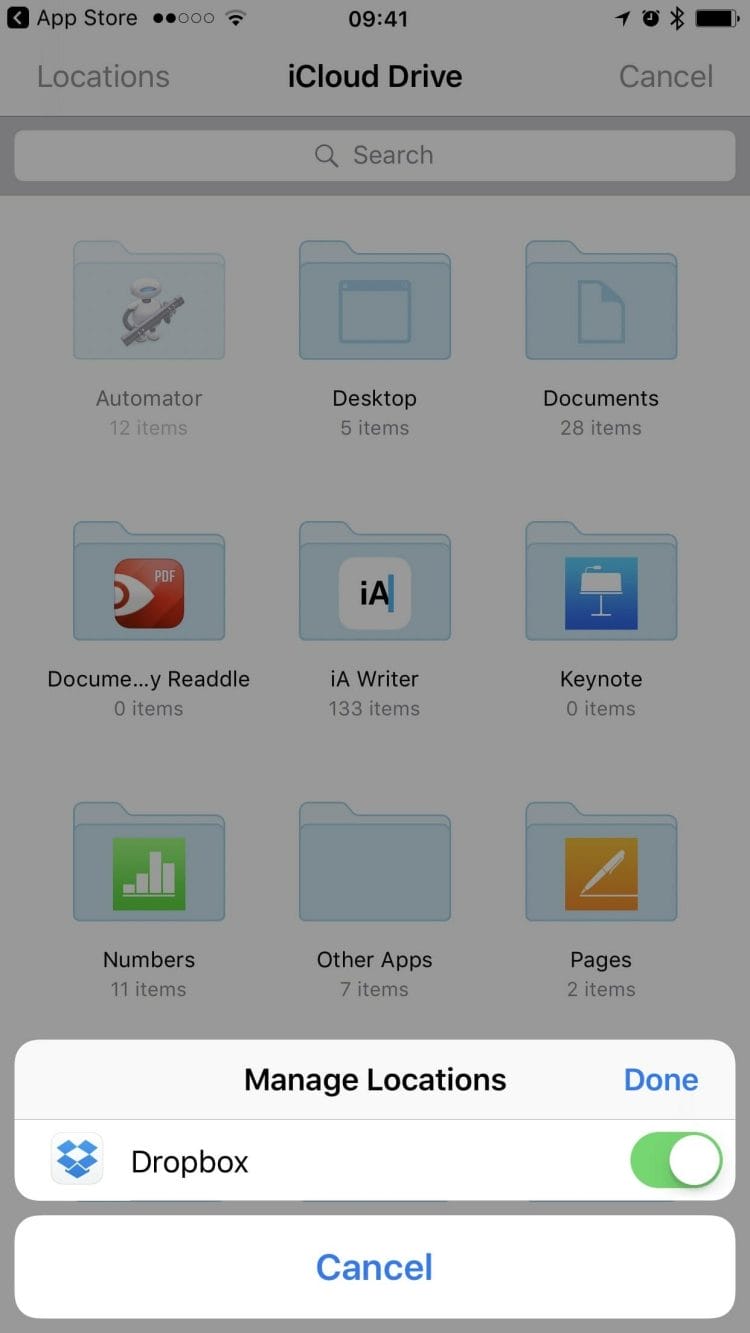
I have all the fonts I need on iOS in a folder in Dropbox. To access Dropbox from iFont, follow these steps:
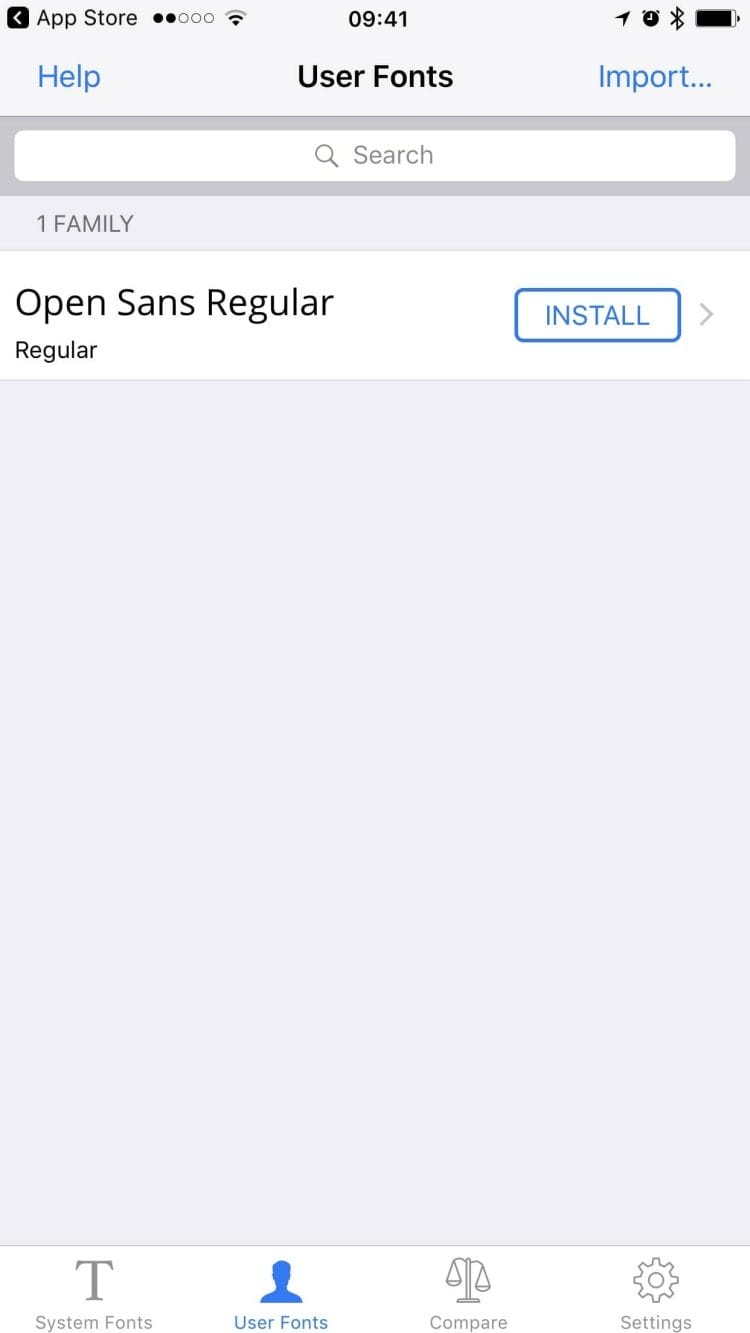
- Go to "User Fonts" at the bottom of the app
- Click on "Import…" in the upper-right corner
- Choose "Locations" in the upper-left corner
- Click on "More" and enable Dropbox
Install fonts from iCloud Drive
If you have your fonts installed on iCloud Drive, no additional steps are necessary as iCloud Drive is the default location.
Install fonts from email
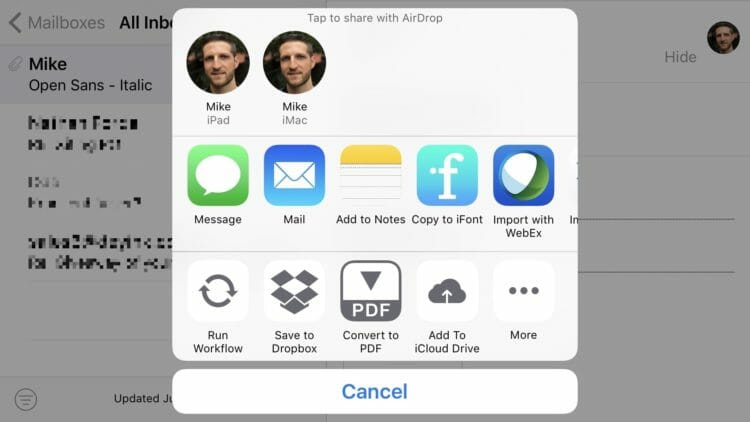
To install fonts from email, only send yourself the desired TTF files, then go to Mail and click on the TTF file in the attachment. When you do that, a sharing sheet will come up where you can select "Copy to iFont."
How to install a single font
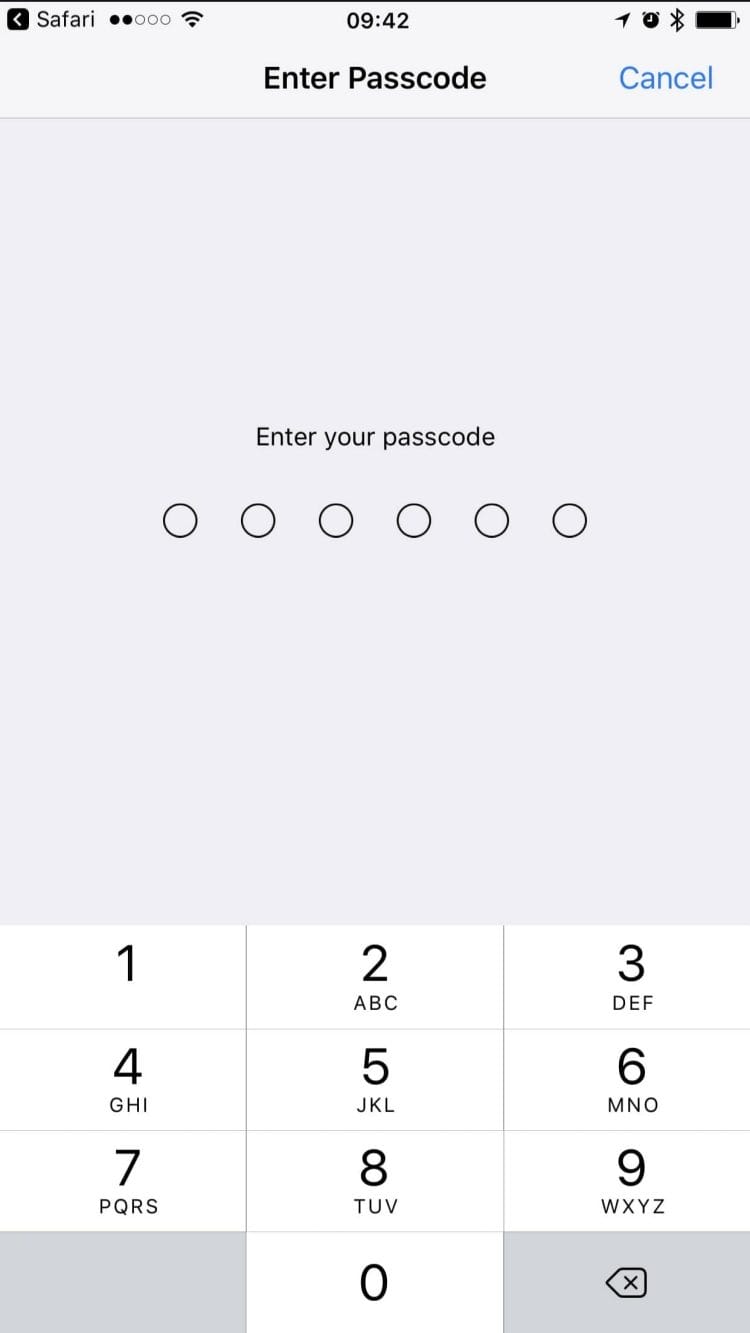
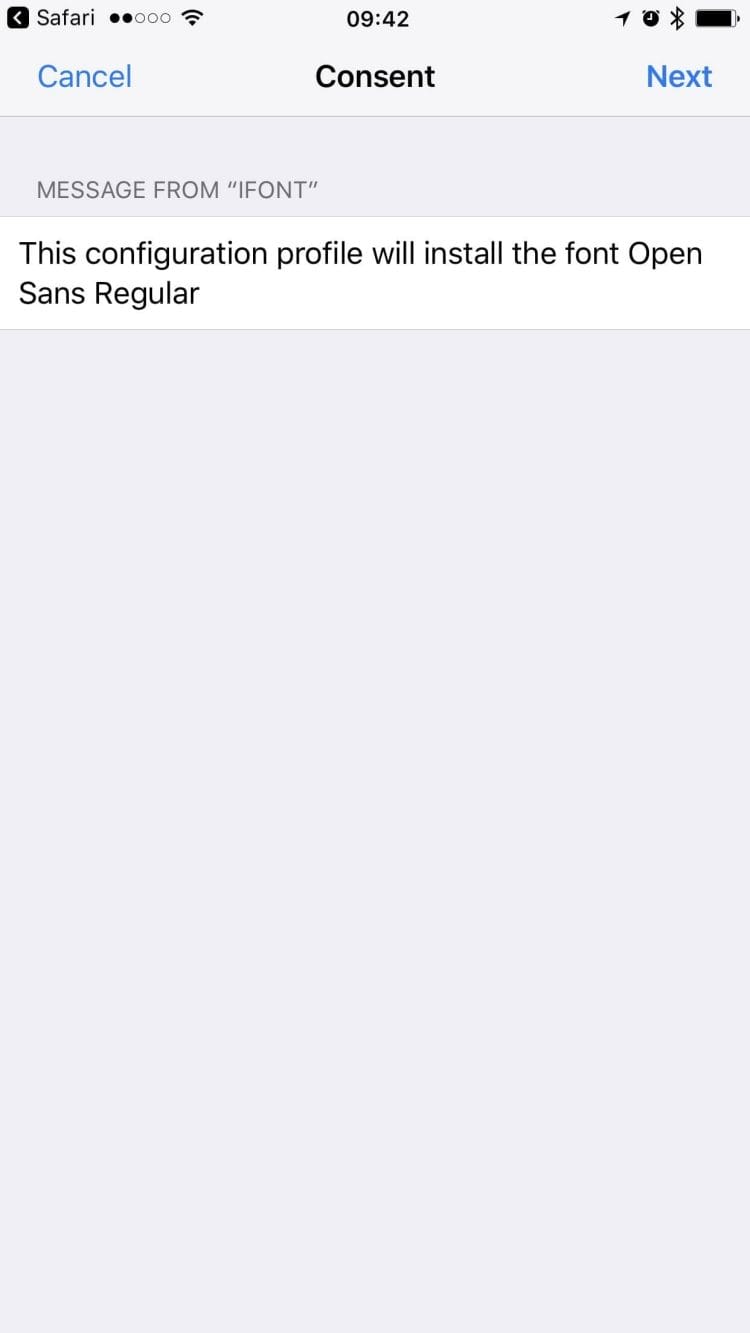
Once the required fonts have been copied to iFont, the installation steps are relatively straightforward. You can select to install one font at a time, or multiple fonts using a single configuration profile. To install a single font on iOS using iFont, follow these steps:
- Copy the font to iFont (see steps above)
- Use the INSTALL button on the right side
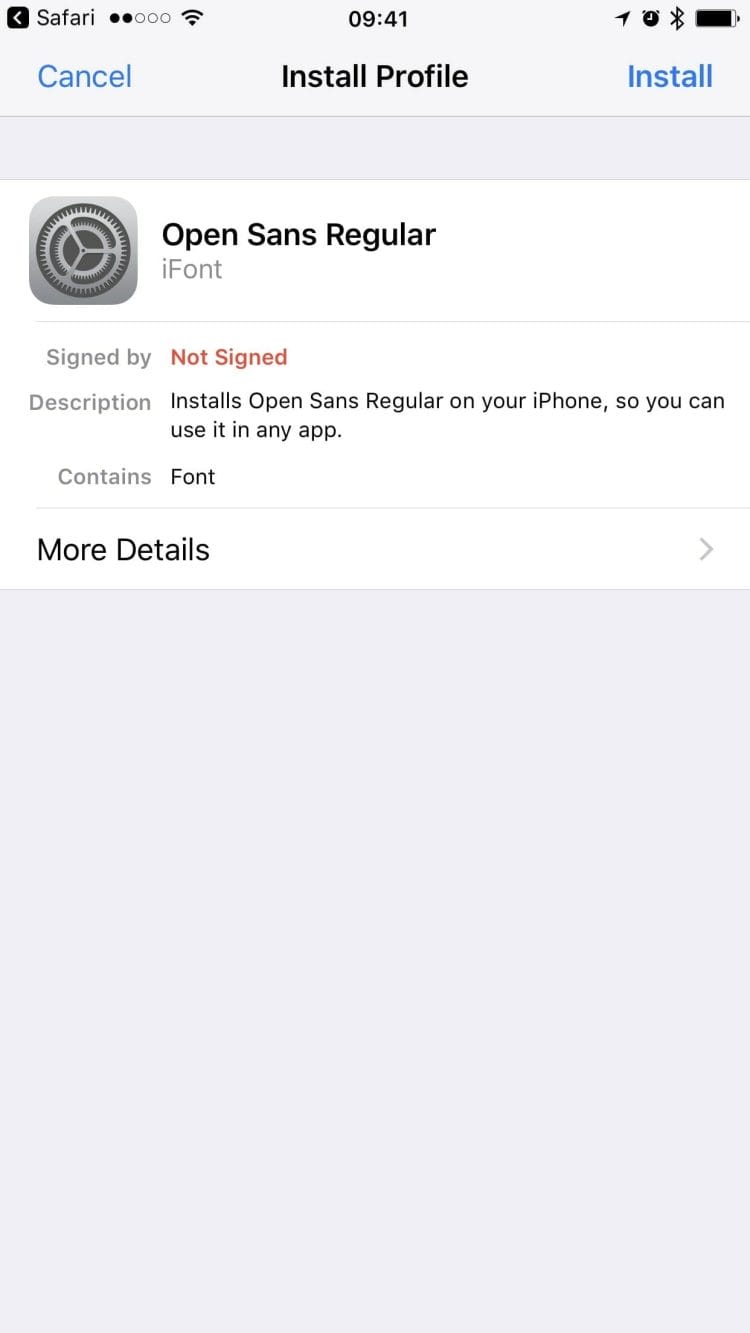
- Select "Install" on the Install Profile sheet
- Enter your iOS passcode to confirm
- Confirm your consent by clicking "Next."
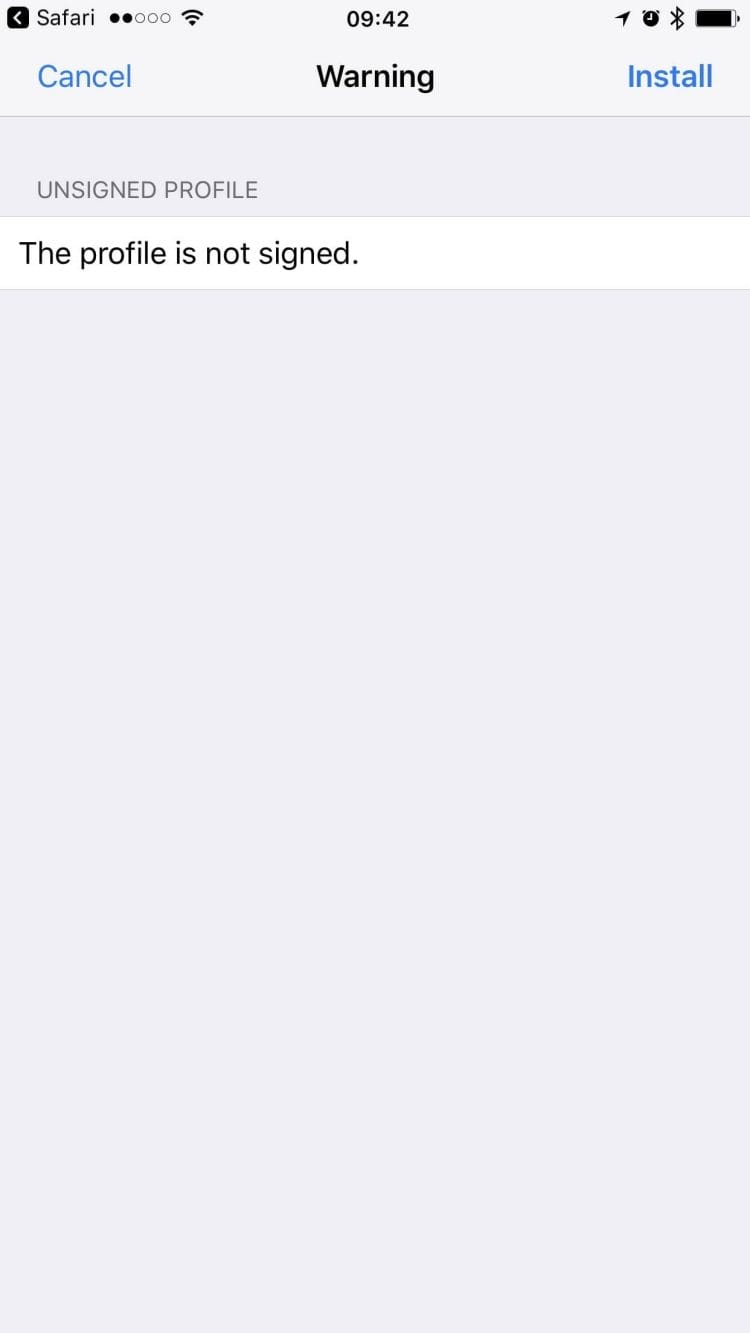
- Acknowledge the warning that the font profile is not signed
Configuration profiles should usually be signed by a trusted certificate. I assume that may not be possible because iFont creates those configuration profiles on-the-fly and in iOS. iFont would have to include their private signing key as part of the app, and someone could then steal and misuse it.
How to install multiple fonts
With the last version of iFont, you can also install multiple fonts as part of a single configuration profile. You will see a "Bulk install" option after adding at least two fonts to iFont. When you click it, you get a list of all fonts in iFont that have not been installed yet. Select at least two fonts and follow the same steps as above.
iFont 4.0
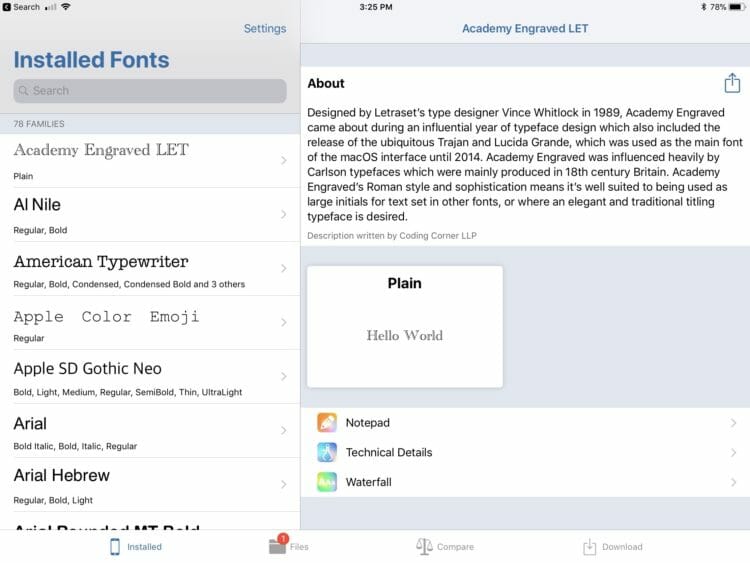
Coding Corner recently released updates for iFont to introduce a couple of new and interesting features, including:
- Completely new interface for iPad with split-screen multitasking and drag-and-drop support
- Ability to import fonts as ZIP files
- Ability to browse and download from Google Fonts
- New waterfall and technical views
- New sorting and search functions
- Browse fonts' Wikipedia pages right within iFont
Conclusion
Missing fonts on iOS is an issue of the past, thanks to apps like iFont. For the average Joe, installing additional fonts may not be a primary concern, but if you use your iOS devices to view, edit or create Microsoft Office or iWork documents, you will appreciate the ability to install missing fonts. Without the proper fonts, your documents may look different on a Mac or Windows machine than they do on iOS. I hope you saw how easy it is to install fonts on iPhone or iPad and I suggest you give iFont a try. The app is free but comes with ads that you can remove through an in-app purchase.

I'm a healthy living and technology enthusiast.
On this blog, I share in-depth product reviews, actionable information and solutions to complex problems in plain and easy-to-understand language.
How To Use Installed Fonts On Iphone
Source: https://michaelkummer.com/tech/install-fonts-ios/
Posted by: yorktudder.blogspot.com

0 Response to "How To Use Installed Fonts On Iphone"
Post a Comment